netty-socketio + springboot 消息推送服务
netty-socketio + springboot 消息推送服务
- 后端
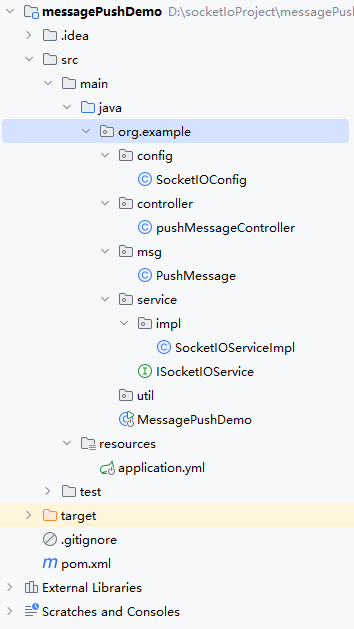
- 1. 目录结构:
- 代码
- pom文件:
- application.yml:
- SocketIOConfig:
- PushMessage:
- ISocketIOService
- SocketIOServiceImpl:
- pushMessageController:
- 启动类:MessagePushDemo:
- 前端
- 安装客户端
- client.js
- 参考文档:
-
背景:后端业务代码中调用这个消息推送服务,主动推送消息给客户端。前端(客户端)连接 消息推送服务,并可以实时的收到服务器发来的消息。
-
注意点:
- 客户端与服务器(netty-socketio)版本不兼容会导致:客户端链接服务端成功,但是收不到服务端发来的消息。官方推荐的版本匹配。
- 客户端发送消息需要序列化处理,否则服务端会报错:Can’t read value: [“push_event”,““zudhfb””] for type: class com.corundumstudio.socketio.protocol.Event
-
文章参考文档放在最后
后端
1. 目录结构:
代码
pom文件:
<project xmlns="http://maven.apache.org/POM/4.0.0" xmlns:xsi="http://www.w3.org/2001/XMLSchema-instance"xsi:schemaLocation="http://maven.apache.org/POM/4.0.0 http://maven.apache.org/xsd/maven-4.0.0.xsd"><modelVersion>4.0.0</modelVersion><groupId>org.example</groupId><artifactId>messagePushDemo</artifactId><version>1.0-SNAPSHOT</version><properties>
<!--    <maven.compiler.source>11</maven.compiler.source>-->
<!--    <maven.compiler.target>11</maven.compiler.target>--><swagger.core.version>1.6.2</swagger.core.version><java.version>1.8</java.version></properties>
<!--  <packaging>jar</packaging>--><!--  <name>messagePushDemo</name>-->
<!--  <url>http://maven.apache.org</url>--><parent><artifactId>spring-boot-starter-parent</artifactId><groupId>org.springframework.boot</groupId><version>2.0.0.RELEASE</version></parent><dependencies><dependency><groupId>org.apache.commons</groupId><artifactId>commons-lang3</artifactId><version>3.13.0</version></dependency><!-- Swagger 依赖配置 --><dependency><groupId>io.swagger</groupId><artifactId>swagger-models</artifactId><version>${swagger.core.version}</version></dependency><dependency><groupId>io.swagger</groupId><artifactId>swagger-annotations</artifactId><version>${swagger.core.version}</version></dependency><!-- Spring MVC依赖 --><dependency><groupId>org.springframework.boot</groupId><artifactId>spring-boot-starter-web</artifactId></dependency><!-- springBoot的Test依赖 --><dependency><groupId>org.springframework.boot</groupId><artifactId>spring-boot-starter-test</artifactId></dependency><dependency><groupId>io.netty</groupId><artifactId>netty-all</artifactId><version>4.1.49.Final</version></dependency><dependency><groupId>com.corundumstudio.socketio</groupId><artifactId>netty-socketio</artifactId><version>1.7.19</version></dependency><dependency><groupId>com.alibaba</groupId><artifactId>fastjson</artifactId><version>1.2.73</version></dependency><dependency><groupId>org.projectlombok</groupId><artifactId>lombok</artifactId><scope>provided</scope></dependency></dependencies><build><plugins><plugin><groupId>org.apache.tomcat.maven</groupId><artifactId>tomcat7-maven-plugin</artifactId><version>2.1</version></plugin></plugins></build></project>
application.yml:
# Tomcat
server:port: 8080socketio:# host在本地测试可以设置为localhost或者本机IPhost: localhostport: 9099# 在Linux服务器跑可换成服务器外网IPpublic:host: localhostallowCustomRequests: true# socket连接数大小(如只监听一个端口boss线程组为1即可)bossCount: 1# 设置最大每帧处理数据的长度,防止他人利用大数据来攻击服务器maxFramePayloadLength: 1048576# 设置http交互最大内容长度maxHttpContentLength: 1048576# Ping消息间隔(毫秒),默认25秒。客户端向服务器发送一条心跳消息间隔pingInterval: 25000# Ping消息超时时间(毫秒),默认60秒,这个时间间隔内没有接收到心跳消息就会发送超时事件pingTimeout: 6000000# 协议升级超时时间(毫秒),默认10秒。HTTP握手升级为ws协议超时时间upgradeTimeout: 1000000workCount: 100
SocketIOConfig:
import com.corundumstudio.socketio.SocketConfig;
import org.springframework.beans.factory.annotation.Value;
import org.springframework.context.annotation.Bean;
import org.springframework.context.annotation.Configuration;
import com.corundumstudio.socketio.SocketIOServer;@Configuration
public class SocketIOConfig {@Value("${socketio.host}")private String host;@Value("${socketio.port}")private Integer port;@Value("${socketio.bossCount}")private int bossCount;@Value("${socketio.workCount}")private int workCount;@Value("${socketio.allowCustomRequests}")private boolean allowCustomRequests;@Value("${socketio.upgradeTimeout}")private int upgradeTimeout;@Value("${socketio.pingTimeout}")private int pingTimeout;@Value("${socketio.pingInterval}")private int pingInterval;/*** 以下配置在上面的application.properties中已经注明* @return*/@Beanpublic SocketIOServer socketIOServer() {SocketConfig socketConfig = new SocketConfig();socketConfig.setTcpNoDelay(true);socketConfig.setSoLinger(0);com.corundumstudio.socketio.Configuration config = new com.corundumstudio.socketio.Configuration();config.setSocketConfig(socketConfig);config.setHostname(host);config.setPort(port);config.setBossThreads(bossCount);config.setWorkerThreads(workCount);config.setAllowCustomRequests(allowCustomRequests);config.setUpgradeTimeout(upgradeTimeout);config.setPingTimeout(pingTimeout);config.setPingInterval(pingInterval);return new SocketIOServer(config);}
}
PushMessage:
package org.example.msg;import io.swagger.annotations.ApiModelProperty;
public class PushMessage {@ApiModelProperty(value = "登录用户编号/唯一标识")private String clientId;@ApiModelProperty(value = "推送事件")private String event;@ApiModelProperty(value = "推送内容")private String content;public PushMessage() {}public PushMessage(String clientId, String event, String content) {this.clientId = clientId;this.event = event;this.content = content;}private PushMessage(Builder builder) {setClientId(builder.clientId);setEvent(builder.event);setContent(builder.content);}public static Builder newBuilder() {return new Builder();}public String getClientId() {return clientId;}public void setClientId(String clientId) {this.clientId = clientId;}public String getEvent() {return event;}public void setEvent(String event) {this.event = event;}public String getContent() {return content;}public void setContent(String content) {this.content = content;}public static final class Builder {private String clientId;private String event;private String content;private Builder() {}public Builder clientId(String val) {clientId = val;return this;}public Builder event(String val) {event = val;return this;}public Builder content(String val) {content = val;return this;}public PushMessage build() {return new PushMessage(this);}}
}
ISocketIOService
package org.example.service;import org.example.msg.PushMessage;public interface ISocketIOService {/*** 推送的事件*/String PUSH_EVENT = "push_event";/*** 聊天的事件*/String IM_EVENT = "im_event";/*** 登录的事件*/String LOGIN_EVENT = "login_event";/*** 启动服务*/void start() throws Exception;/*** 停止服务*/void stop();/*** 推送信息*/void pushMessageToUser(PushMessage pushMessage);
}
SocketIOServiceImpl:
package org.example.service.impl;import java.util.Iterator;
import java.util.Map;
import java.util.concurrent.ConcurrentHashMap;
import javax.annotation.PostConstruct;
import javax.annotation.PreDestroy;
import org.apache.commons.lang3.StringUtils;
import org.example.msg.PushMessage;
import org.example.service.ISocketIOService;
import org.slf4j.Logger;
import org.slf4j.LoggerFactory;
import org.springframework.beans.factory.annotation.Autowired;
import org.springframework.stereotype.Service;
import com.corundumstudio.socketio.SocketIOClient;
import com.corundumstudio.socketio.SocketIOServer;import static org.example.service.ISocketIOService.IM_EVENT;
import static org.example.service.ISocketIOService.PUSH_EVENT;@Service(value = "socketIOService")
public class SocketIOServiceImpl implements ISocketIOService {private Logger logger = LoggerFactory.getLogger(SocketIOServiceImpl.class);/*** 用来存已连接的客户端*/private static Map<String, SocketIOClient> clientMap = new ConcurrentHashMap<>();@Autowiredprivate SocketIOServer server;/*** Spring IoC容器创建之后,在加载SocketIOServiceImpl Bean之后启动* @throws Exception*/@PostConstructprivate void autoStartup() throws Exception {start();}/*** Spring IoC容器在销毁SocketIOServiceImpl Bean之前关闭,避免重启项目服务端口占用问题* @throws Exception*/@PreDestroyprivate void autoStop() throws Exception  {stop();}@Overridepublic void start() {// 监听客户端连接server.addConnectListener(client -> {String clientId = getParamsByClient(client);if (clientId != null) {if (clientMap.isEmpty()) {clientMap.put(clientId, client);logger.info("clientId: {} connected...", clientId);}else {if (clientMap.containsKey(clientId)) {SocketIOClient preClient = clientMap.get(clientId);preClient.disconnect();logger.info("旧链接已断开");}clientMap.put(clientId, client);logger.info("clientId: {} connected...", clientId);}}});// 监听客户端断开连接server.addDisconnectListener(client -> {String clientId = getParamsByClient(client);if (clientId != null) {clientMap.remove(clientId);client.disconnect();logger.info("clientId: {} disconnected...", clientId);}});// 处理自定义的事件,与连接监听类似server.addEventListener(PUSH_EVENT, PushMessage.class, (client, data, ackSender) -> {logger.info("eventListener data: {}", data);});server.addEventListener(IM_EVENT, PushMessage.class, (client, data, ackSender) -> {logger.info("eventListener data: {}", data);});server.start();}@Overridepublic void stop() {if (server != null) {server.stop();server = null;logger.info("server stop!");}}@Overridepublic void pushMessageToUser(PushMessage pushMessage) {String clientIds = pushMessage.getClientId();if (StringUtils.isNotBlank(clientIds)) {for (String clientId : clientIds.split(",")) {SocketIOClient client = clientMap.get(clientId);if (client != null) {client.sendEvent(pushMessage.getEvent(), pushMessage.getContent());logger.info("push message: {}, toClientId: {}", pushMessage.getContent(), clientId);}else {logger.info("当前客户端无连接");}}}}/*** 此方法为获取client连接中的参数,可根据需求更改* @param client* @return*/private String getParamsByClient(SocketIOClient client) {// 从请求的连接中拿出参数(这里的clientId必须是唯一标识)return client.getHandshakeData().getSingleUrlParam("clientId");}
}
pushMessageController:
package org.example.controller;import org.example.msg.PushMessage;
import org.example.service.ISocketIOService;
import org.springframework.beans.factory.annotation.Autowired;
import org.springframework.web.bind.annotation.GetMapping;
import org.springframework.web.bind.annotation.RequestParam;
import org.springframework.web.bind.annotation.ResponseBody;
import org.springframework.web.bind.annotation.RestController;@RestController
public class pushMessageController {@Autowiredprivate ISocketIOService socketIOService;@GetMapping("/im/push")@ResponseBodypublic String pushMessage(@RequestParam String clientId,@RequestParam String content){if (clientId == null || clientId.isEmpty()){return "参数为空错误";}PushMessage pushMessage = new PushMessage(clientId, ISocketIOService.IM_EVENT, content);socketIOService.pushMessageToUser(pushMessage);return "success";}}
启动类:MessagePushDemo:
package org.example;import org.springframework.boot.SpringApplication;
import org.springframework.boot.autoconfigure.SpringBootApplication;/*** Hello world!**/
@SpringBootApplication
public class MessagePushDemo
{public static void main( String[] args ){SpringApplication.run(MessagePushDemo.class, args);
//        System.out.println( "Hello World!" );}
}
前端
安装客户端
npm install socket.io-client@2
我安装的2开头的版本,注意和服务器的版本兼容
client.js
const io = require('socket.io-client');// 配置连接选项
const options = {// 开启重连机制reconnection: true, // 最大重连次数reconnectionAttempts: Infinity, // 重连间隔时间,初始为 1000 毫秒reconnectionDelay: 1000, // 重连间隔时间上限,最大为 5000 毫秒reconnectionDelayMax: 5000, // 连接超时时间,设置为 10000 毫秒timeout: 10000
};// 使用配置选项连接到服务器
const socket = io('http://localhost:9099?clientId=122', options);// 监听连接成功事件
socket.on('connect', () => {console.log('连接成功');
});// 监听事件
socket.on('im_event', (msg) => {console.log('事件内容:', msg);
});// 定义一个示例数据对象
const data = {clientId: '122',event: "push_event",content: '你好'
};// 将对象转换为 JSON 字符串,类似于 Java 中 Gson 的 toJson 方法
const jsonString = JSON.stringify(data);// 将 JSON 字符串解析回对象,类似于 Java 中创建 JSONObject
const parsedObject = JSON.parse(jsonString);
console.log('原始对象:', data);
console.log('JSON 字符串:', jsonString);
console.log('解析后的对象:', parsedObject);
//向服务端发送消息
socket.emit("push_event", parsedObject );// 监听连接错误事件
//socket.on('connect_error', (error) => {
//    console.error('连接错误:', error);
//});// 监听断开连接事件
socket.on('disconnect', () => {console.log('连接已断开');
});
参考文档:
socket.io官方文档
代码原博主文章