【嵌入式人工智能产品开发实战】(十九)—— 政安晨:小智AI嵌入式终端代码解读:【A】应用入口
政安晨的个人主页:政安晨
欢迎 👍点赞✍评论⭐收藏
希望政安晨的博客能够对您有所裨益,如有不足之处,欢迎在评论区提出指正!
本篇我们解析小智AI嵌入式终端的应用启动流程:
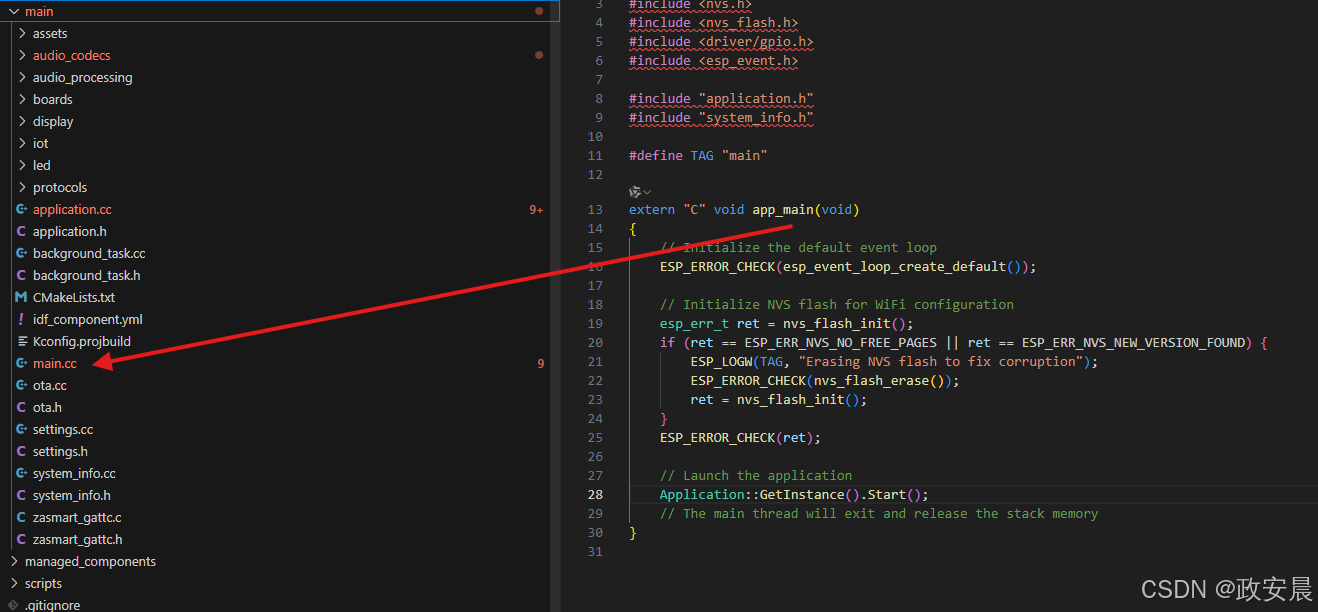
代码解读从main.cc文件的app_main(void)入口开始。
extern "C" void app_main(void)
{// Initialize the default event loopESP_ERROR_CHECK(esp_event_loop_create_default());// Initialize NVS flash for WiFi configurationesp_err_t ret = nvs_flash_init();if (ret == ESP_ERR_NVS_NO_FREE_PAGES || ret == ESP_ERR_NVS_NEW_VERSION_FOUND) {ESP_LOGW(TAG, "Erasing NVS flash to fix corruption");ESP_ERROR_CHECK(nvs_flash_erase());ret = nvs_flash_init();}ESP_ERROR_CHECK(ret);// Launch the applicationApplication::GetInstance().Start();// The main thread will exit and release the stack memory
}
这段代码:
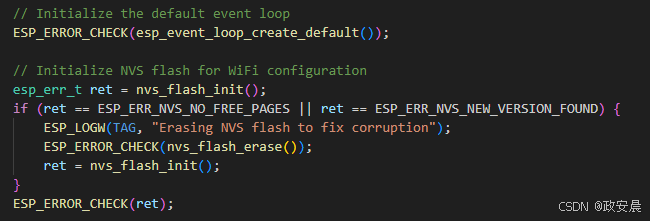
乐鑫框架启动的标准操作,初始化flash,之后启动应用程序。
- 初始化默认事件循环。
- 初始化NVS闪存,若失败则擦除并重试。
- 启动应用程序实例。
- 主线程退出并释放栈内存。
下面就正式启动应用:

我们详细看一下Start方法中的实现:
完整代码:
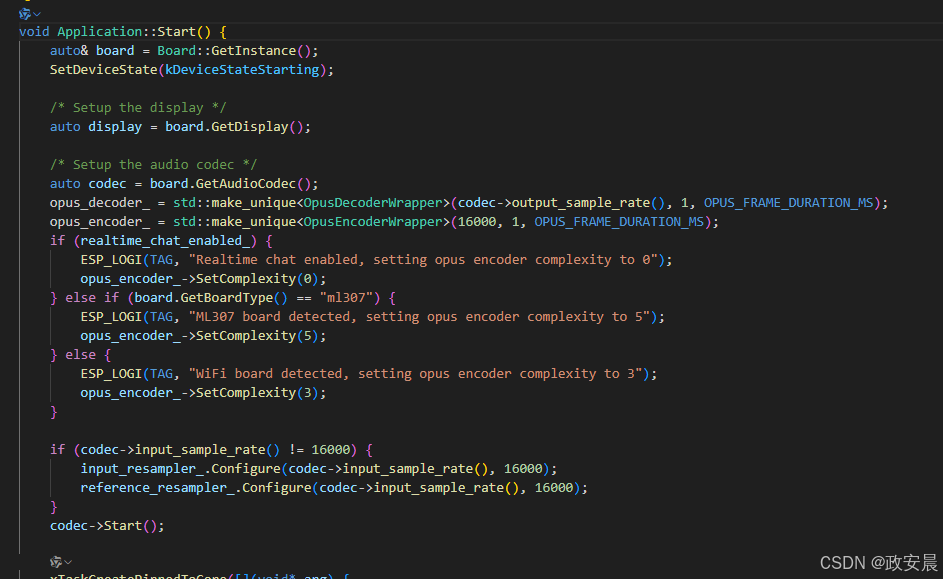
void Application::Start() {auto& board = Board::GetInstance();SetDeviceState(kDeviceStateStarting);/* Setup the display */auto display = board.GetDisplay();/* Setup the audio codec */auto codec = board.GetAudioCodec();opus_decoder_ = std::make_unique<OpusDecoderWrapper>(codec->output_sample_rate(), 1, OPUS_FRAME_DURATION_MS);opus_encoder_ = std::make_unique<OpusEncoderWrapper>(16000, 1, OPUS_FRAME_DURATION_MS);if (realtime_chat_enabled_) {ESP_LOGI(TAG, "Realtime chat enabled, setting opus encoder complexity to 0");opus_encoder_->SetComplexity(0);} else if (board.GetBoardType() == "ml307") {ESP_LOGI(TAG, "ML307 board detected, setting opus encoder complexity to 5");opus_encoder_->SetComplexity(5);} else {ESP_LOGI(TAG, "WiFi board detected, setting opus encoder complexity to 3");opus_encoder_->SetComplexity(3);}if (codec->input_sample_rate() != 16000) {input_resampler_.Configure(codec->input_sample_rate(), 16000);reference_resampler_.Configure(codec->input_sample_rate(), 16000);}codec->Start();xTaskCreatePinnedToCore([](void* arg) {Application* app = (Application*)arg;app->AudioLoop();vTaskDelete(NULL);}, "audio_loop", 4096 * 2, this, 8, &audio_loop_task_handle_, realtime_chat_enabled_ ? 1 : 0);/* Start the main loop */xTaskCreatePinnedToCore([](void* arg) {Application* app = (Application*)arg;app->MainLoop();vTaskDelete(NULL);}, "main_loop", 4096 * 2, this, 4, &main_loop_task_handle_, 0);/* Wait for the network to be ready */board.StartNetwork();// Initialize the protocoldisplay->SetStatus(Lang::Strings::LOADING_PROTOCOL);
#ifdef CONFIG_CONNECTION_TYPE_WEBSOCKETprotocol_ = std::make_unique<WebsocketProtocol>();
#elseprotocol_ = std::make_unique<MqttProtocol>();
#endifprotocol_->OnNetworkError([this](const std::string& message) {SetDeviceState(kDeviceStateIdle);Alert(Lang::Strings::ERROR, message.c_str(), "sad", Lang::Sounds::P3_EXCLAMATION);});protocol_->OnIncomingAudio([this](std::vector<uint8_t>&& data) {std::lock_guard<std::mutex> lock(mutex_);audio_decode_queue_.emplace_back(std::move(data));});protocol_->OnAudioChannelOpened([this, codec, &board]() {board.SetPowerSaveMode(false);if (protocol_->server_sample_rate() != codec->output_sample_rate()) {ESP_LOGW(TAG, "Server sample rate %d does not match device output sample rate %d, resampling may cause distortion",protocol_->server_sample_rate(), codec->output_sample_rate());}SetDecodeSampleRate(protocol_->server_sample_rate(), protocol_->server_frame_duration());auto& thing_manager = iot::ThingManager::GetInstance();protocol_->SendIotDescriptors(thing_manager.GetDescriptorsJson());std::string states;if (thing_manager.GetStatesJson(states, false)) {protocol_->SendIotStates(states);}});protocol_->OnAudioChannelClosed([this, &board]() {board.SetPowerSaveMode(true);Schedule([this]() {auto display = Board::GetInstance().GetDisplay();display->SetChatMessage("system", "");SetDeviceState(kDeviceStateIdle);});});protocol_->OnIncomingJson([this, display](const cJSON* root) {// Parse JSON dataauto type = cJSON_GetObjectItem(root, "type");if (strcmp(type->valuestring, "tts") == 0) {auto state = cJSON_GetObjectItem(root, "state");if (strcmp(state->valuestring, "start") == 0) {Schedule([this]() {aborted_ = false;if (device_state_ == kDeviceStateIdle || device_state_ == kDeviceStateListening) {SetDeviceState(kDeviceStateSpeaking);}});} else if (strcmp(state->valuestring, "stop") == 0) {Schedule([this]() {background_task_->WaitForCompletion();if (device_state_ == kDeviceStateSpeaking) {if (listening_mode_ == kListeningModeManualStop) {SetDeviceState(kDeviceStateIdle);} else {SetDeviceState(kDeviceStateListening);}}});} else if (strcmp(state->valuestring, "sentence_start") == 0) {auto text = cJSON_GetObjectItem(root, "text");if (text != NULL) {ESP_LOGI(TAG, "<< %s", text->valuestring);Schedule([this, display, message = std::string(text->valuestring)]() {display->SetChatMessage("assistant", message.c_str());});}}} else if (strcmp(type->valuestring, "stt") == 0) {auto text = cJSON_GetObjectItem(root, "text");if (text != NULL) {ESP_LOGI(TAG, ">> %s", text->valuestring);Schedule([this, display, message = std::string(text->valuestring)]() {display->SetChatMessage("user", message.c_str());});}} else if (strcmp(type->valuestring, "llm") == 0) {auto emotion = cJSON_GetObjectItem(root, "emotion");if (emotion != NULL) {Schedule([this, display, emotion_str = std::string(emotion->valuestring)]() {display->SetEmotion(emotion_str.c_str());});}} else if (strcmp(type->valuestring, "iot") == 0) {auto commands = cJSON_GetObjectItem(root, "commands");if (commands != NULL) {auto& thing_manager = iot::ThingManager::GetInstance();for (int i = 0; i < cJSON_GetArraySize(commands); ++i) {auto command = cJSON_GetArrayItem(commands, i);thing_manager.Invoke(command);}}}});protocol_->Start();// Check for new firmware version or get the MQTT broker addressota_.SetCheckVersionUrl(CONFIG_OTA_VERSION_URL);ota_.SetHeader("Device-Id", SystemInfo::GetMacAddress().c_str());ota_.SetHeader("Client-Id", board.GetUuid());ota_.SetHeader("Accept-Language", Lang::CODE);auto app_desc = esp_app_get_description();ota_.SetHeader("User-Agent", std::string(BOARD_NAME "/") + app_desc->version);xTaskCreate([](void* arg) {Application* app = (Application*)arg;app->CheckNewVersion();vTaskDelete(NULL);}, "check_new_version", 4096 * 2, this, 2, nullptr);#if CONFIG_USE_AUDIO_PROCESSORaudio_processor_.Initialize(codec, realtime_chat_enabled_);audio_processor_.OnOutput([this](std::vector<int16_t>&& data) {background_task_->Schedule([this, data = std::move(data)]() mutable {opus_encoder_->Encode(std::move(data), [this](std::vector<uint8_t>&& opus) {Schedule([this, opus = std::move(opus)]() {protocol_->SendAudio(opus);});});});});audio_processor_.OnVadStateChange([this](bool speaking) {if (device_state_ == kDeviceStateListening) {Schedule([this, speaking]() {if (speaking) {voice_detected_ = true;} else {voice_detected_ = false;}auto led = Board::GetInstance().GetLed();led->OnStateChanged();});}});
#endif#if CONFIG_USE_WAKE_WORD_DETECTwake_word_detect_.Initialize(codec);wake_word_detect_.OnWakeWordDetected([this](const std::string& wake_word) {Schedule([this, &wake_word]() {if (device_state_ == kDeviceStateIdle) {SetDeviceState(kDeviceStateConnecting);wake_word_detect_.EncodeWakeWordData();if (!protocol_->OpenAudioChannel()) {wake_word_detect_.StartDetection();return;}std::vector<uint8_t> opus;// Encode and send the wake word data to the serverwhile (wake_word_detect_.GetWakeWordOpus(opus)) {protocol_->SendAudio(opus);}// Set the chat state to wake word detectedprotocol_->SendWakeWordDetected(wake_word);ESP_LOGI(TAG, "Wake word detected: %s", wake_word.c_str());SetListeningMode(realtime_chat_enabled_ ? kListeningModeRealtime : kListeningModeAutoStop);} else if (device_state_ == kDeviceStateSpeaking) {AbortSpeaking(kAbortReasonWakeWordDetected);} else if (device_state_ == kDeviceStateActivating) {SetDeviceState(kDeviceStateIdle);}});});wake_word_detect_.StartDetection();
#endifSetDeviceState(kDeviceStateIdle);esp_timer_start_periodic(clock_timer_handle_, 1000000);#if 0while (true) {SystemInfo::PrintRealTimeStats(pdMS_TO_TICKS(1000));vTaskDelay(pdMS_TO_TICKS(10000));}
#endif
}
流程概述如下:
该函数是应用程序的启动入口,主要完成以下功能:
- 初始化显示和音频编解码器。
- 根据设备类型和配置设置Opus编解码器复杂度。
- 创建音频处理和主循环任务。
- 初始化网络并启动协议(WebSocket或MQTT)。
- 处理协议事件(如音频通道开关、JSON消息解析)。
- 检查固件更新并初始化音频处理器和唤醒词检测(如果启用)。
- 启动定时器并进入空闲状态。
流程图:
flowchart TDStart[开始启动] --> InitDisplay[初始化显示]InitDisplay --> InitAudioCodec[初始化音频编解码器]InitAudioCodec --> SetOpusComplexity[设置Opus复杂度]SetOpusComplexity --> CreateTasks[创建音频和主循环任务]CreateTasks --> InitNetwork[初始化网络]InitNetwork --> StartProtocol[启动协议]StartProtocol --> HandleProtocolEvents[处理协议事件]HandleProtocolEvents --> CheckFirmware[检查固件更新]CheckFirmware --> InitAudioProcessor[初始化音频处理器]InitAudioProcessor --> InitWakeWordDetect[初始化唤醒词检测]InitWakeWordDetect --> EnterIdleState[进入空闲状态]EnterIdleState --> End[启动完成]详细一点的概要解释:
该函数是应用程序的核心启动逻辑,详细功能如下:
- 初始化硬件设备:通过
Board::GetInstance()获取单例对象,初始化显示和音频编解码器。- 配置Opus编解码器:根据设备类型(如
ml307或WiFi板)和实时聊天功能开关,动态设置Opus编码器的复杂度。- 创建任务:使用
xTaskCreatePinnedToCore创建两个核心任务:
- 音频处理循环任务(
AudioLoop)。- 主循环任务(
MainLoop)。- 网络初始化:调用
board.StartNetwork()等待网络就绪。- 协议初始化:根据配置选择WebSocket或MQTT协议,并注册事件回调(如网络错误、音频通道开关、JSON消息处理)。
- 固件更新检查:通过OTA模块检查新版本固件。
- 音频处理器初始化(可选):如果启用
CONFIG_USE_AUDIO_PROCESSOR,初始化音频处理器并注册输出和语音活动检测回调。- 唤醒词检测初始化(可选):如果启用
CONFIG_USE_WAKE_WORD_DETECT,初始化唤醒词检测并注册唤醒词检测回调。- 定时器启动:启动周期性定时器。
- 进入空闲状态:完成所有初始化后,设置设备状态为空闲。
flowchart TDStart[开始启动] --> InitBoard[获取单例Board实例]InitBoard --> SetDeviceStateStarting[设置设备状态为启动中]SetDeviceStateStarting --> InitDisplay[初始化显示]InitDisplay --> InitAudioCodec[初始化音频编解码器]InitAudioCodec --> ConfigureOpusEncoder[配置Opus编码器复杂度]ConfigureOpusEncoder --> CreateAudioTask[创建音频处理任务]CreateAudioTask --> CreateMainTask[创建主循环任务]CreateMainTask --> InitNetwork[初始化网络]InitNetwork --> StartProtocol[启动协议]StartProtocol --> RegisterCallbacks[注册协议事件回调]RegisterCallbacks --> CheckFirmware[检查固件更新]CheckFirmware --> InitAudioProcessor{是否启用音频处理器}InitAudioProcessor -->|Yes| ConfigureAudioProcessor[配置音频处理器]InitAudioProcessor -->|No| InitWakeWordDetect{是否启用唤醒词检测}InitWakeWordDetect -->|Yes| ConfigureWakeWordDetect[配置唤醒词检测]InitWakeWordDetect -->|No| EnterIdleState[进入空闲状态]ConfigureAudioProcessor --> InitWakeWordDetectConfigureWakeWordDetect --> EnterIdleStateEnterIdleState --> StartTimer[启动定时器]StartTimer --> End[启动完成]赞扬一下小智AI的嵌入式开发团队,封装的不错,每个通用功能封装起来,与主板有关的硬件差异单独封装到board类中。
启动函数中,先把board类实例化,然后接下来将硬件以board中的方法逐渐初始化完成,并在这个过程中启动通用的功能进程。