Flutter TextField和Button组件开发登录页面案例
In this section, we’ll go through building a basic login screen using the Button and TextField widgets. We’ll follow a step-bystep approach, allowing you to code along and understand each part of the process. Let’s get started!
在本节中,我们将使用“Button”和“TextField”小部件构建一个基本的登录屏幕。我们将遵循一步一步的方法,允许您编写代码并理解过程的每个部分。我们开始吧!
Scenario: Creating a Login Screen
场景:创建登录界面
Imagine you’re building a mobile app that requires user authentication. You want users to be able to log in securely, so you need to design a login screen. This screen should include fields for users to enter their username and password, along with a “Login” button to initiate the authentication process. Additionally, you want to ensure that the password remains hidden as users type it.
假设您正在构建一个需要用户身份验证的移动应用程序。您希望用户能够安全登录,因此需要设计一个登录屏幕。该屏幕应该包括供用户输入用户名和密码的字段,以及用于启动身份验证过程的“Login”按钮。此外,您希望确保在用户键入密码时保持隐藏。
Step 1: Setting Up Your Project
步骤1:设置项目
Before we begin, make sure you have your Flutter project set up. If you haven’t done this yet, refer to previous sections for guidance.
在我们开始之前,确保你有你的Flutter项目设置。如果您还没有这样做,请参考前面的部分以获得指导。
Step 2: Building the Login Screen
步骤 2:创建登录屏幕
Open lib/main.dart: Open the lib/main.dart file in yourproject.
打开 lib/main.dart: 在您的项目中打开 lib/main.dart 文件。
Import Required Packages: Make sure you have thenecessary package imports at the top of the file:
导入所需软件包: 确保在文件顶部有必要的软件包导入:
import ‘package:flutter/material.dart’;
Create the Main Function: Replace the existing main function with the following code:
创建主函数: 用以下代码替换现有的 main 函数:
void main() {runApp(MyApp());
}
Create MyApp Class: Define the MyApp class as follows:
创建 MyApp 类: 定义 MyApp 类如下:
class MyApp extends StatelessWidget {const MyApp({super.key});Widget build(BuildContext context) {return const MaterialApp(title: "用户登录",home: LoginScreen(),);}
}
Create LoginScreen Class: Now, let’s create the LoginScreen class inside the lib folder. This will be the main screen of our app:
class LoginScreen extends StatelessWidget {const LoginScreen({super.key});Widget build(BuildContext context) {return Scaffold(appBar: AppBar(title: const Text("用户登录"),),body: Center(child: Padding(padding: const EdgeInsets.all(16),child: Column(mainAxisAlignment: MainAxisAlignment.center,children: <Widget>[],),)),);}
}
Add TextFields and Button: Inside the Column widget, add the following code to create two TextField widgets for username and password inputs, and an ElevatedButton for login:
添加文本字段和按钮: 在 “列 ”部件中添加以下代码,创建两个用于输入用户名和密码的 TextField 部件,以及一个用于登录的 ElevatedButton:
Column(mainAxisAlignment: MainAxisAlignment.center,children: <Widget>[const TextField(decoration: InputDecoration(labelText: "账号"),),const SizedBox(height: 20),const TextField(decoration: InputDecoration(labelText: "密码"),obscureText: true,),const SizedBox(height: 20),ElevatedButton(onPressed: () {// Add your login logic here},child: const Text("登录"),),],
),
此时main.dart的完整代码如下:
import "package:flutter/material.dart";void main() {runApp(const MyApp());
}class MyApp extends StatelessWidget {const MyApp({super.key});Widget build(BuildContext context) {return const MaterialApp(title: "用户登录",home: LoginScreen(),);}
}class LoginScreen extends StatelessWidget {const LoginScreen({super.key});Widget build(BuildContext context) {return Scaffold(appBar: AppBar(title: const Text("用户登录"),),body: Center(child: Padding(padding: const EdgeInsets.all(16),child: Column(mainAxisAlignment: MainAxisAlignment.center,children: <Widget>[Column(mainAxisAlignment: MainAxisAlignment.center,children: <Widget>[const TextField(decoration: InputDecoration(labelText: "账号"),),const SizedBox(height: 20),const TextField(decoration: InputDecoration(labelText: "密码"),obscureText: true,),const SizedBox(height: 20),ElevatedButton(onPressed: () {// Add your login logic here},child: const Text("登录"),),],),],),)),);}
}
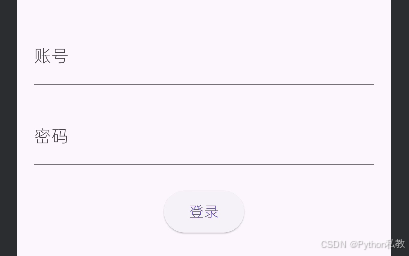
效果预览如下:
Step 3: Exploring the Code
步骤 3:探索代码
Inside the LoginScreen widget, we’ve added two TextField widgets for username and password input, along with a SizedBox to create spacing.
在 LoginScreen 部件中,我们添加了两个用于输入用户名和密码的 TextField 部件,以及一个用于创建间距的 SizedBox。
TextField (Username Input): The first TextField widget allows users to enter their username. We’ve used the decoration property with the InputDecoration class to provide a visual hint (label) inside the text field. The labelText parameter sets the label for the text field, helping users understand what to enter.
TextField(用户名输入): 第一个 TextField 部件允许用户输入用户名。我们使用 InputDecoration 类的装饰属性在文本字段内提供视觉提示(标签)。labelText 参数设置了文本字段的标签,帮助用户了解要输入的内容。
TextField (Password Input): The second TextField widget is used for password input. For security reasons, we’ve set the obscureText property to true. This property hides the entered text, displaying it as dots, asterisks, or other obscured characters. This way, sensitive information like passwords remains hidden.
TextField(密码输入): 第二个 TextField widget 用于密码输入。出于安全考虑,我们将 obscureText 属性设置为 true。该属性会隐藏输入的文本,显示为点、星号或其他模糊字符。这样,像密码这样的敏感信息就会被隐藏起来。
SizedBox: This widget creates a space between the text fields and the button, providing visual separation and improving the layout. The height parameter in SizedBox sets the amount of vertical space between widgets.
SizedBox: 该部件可在文本字段和按钮之间创建一个空间,提供视觉分隔并改善布局。SizedBox 中的高度参数设置了部件之间的垂直空间大小。
ElevatedButton: This widget serves as the login button. For now, the onPressed property is empty. You can later add your login logic here.
ElevatedButton: 该部件用作登录按钮。目前,onPressed 属性为空。您可以稍后在此处添加登录逻辑。
Step 4: Run Your App
步骤 4:运行应用程序
Save your changes and run the app using the command:
保存更改并使用命令运行应用程序:
flutter run
Step 5: Exploring the Login Screen
步骤 5:探索登录屏幕
As the app launches, you’ll see a simple login screen with fields for entering a username and password, along with a “Login” button. Although the button doesn’t currently perform any action, this example provides a foundation for adding authentication logic and creating a functional login experience.
应用程序启动后,您会看到一个简单的登录屏幕,上面有输入用户名和密码的字段,以及一个 “登录 ”按钮。虽然按钮目前不执行任何操作,但这个示例为添加身份验证逻辑和创建功能性登录体验奠定了基础。
代码优化
之前的代码有一个不必要的Column组件嵌套, 去掉后改写如下:
import "package:flutter/material.dart";void main() {runApp(const MyApp());
}class MyApp extends StatelessWidget {const MyApp({super.key});Widget build(BuildContext context) {return const MaterialApp(title: "用户登录",home: LoginScreen(),);}
}class LoginScreen extends StatelessWidget {const LoginScreen({super.key});Widget build(BuildContext context) {return Scaffold(appBar: AppBar(title: const Text("用户登录"),),body: Center(child: Padding(padding: const EdgeInsets.all(16),child: Column(mainAxisAlignment: MainAxisAlignment.center,children: <Widget>[const TextField(decoration: InputDecoration(labelText: "账号"),),const SizedBox(height: 20),const TextField(decoration: InputDecoration(labelText: "密码"),obscureText: true,),const SizedBox(height: 20),ElevatedButton(onPressed: () {// Add your login logic here},child: const Text("登录"),),],),)),);}
}