Unity扩展编辑器使用整理(一)
准备工作
在Unity工程中新建Editor文件夹存放编辑器脚本,
![]()
Unity中其他的特殊文件夹可以参考官方文档链接,如下:
Unity - 手册:保留文件夹名称参考 (unity3d.com)
一、菜单栏扩展
1.增加顶部菜单栏选项
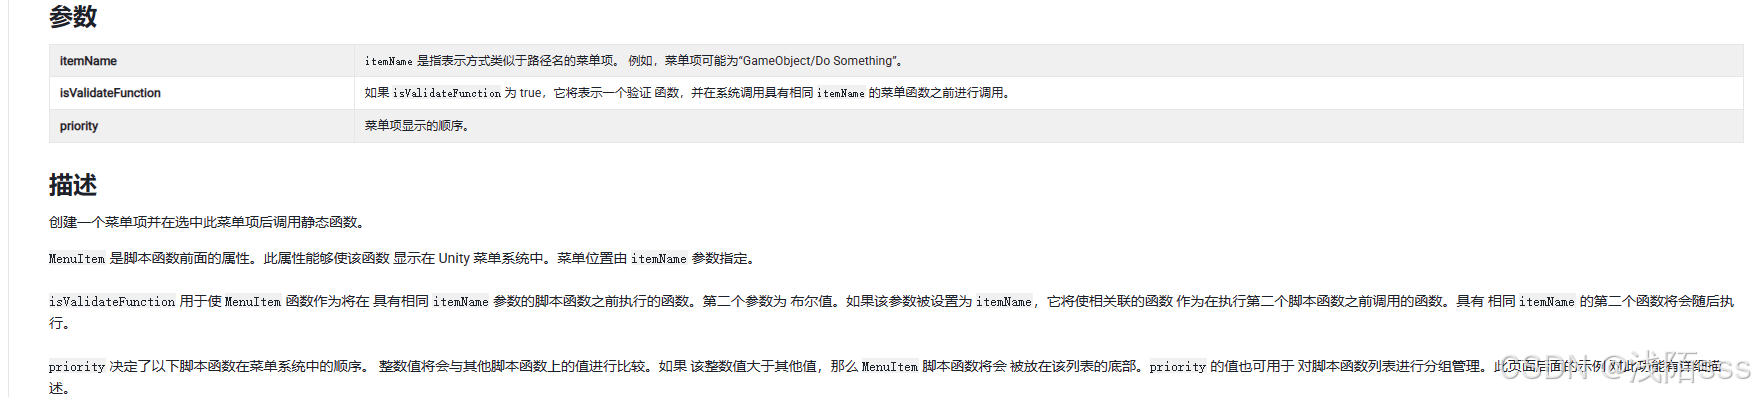
使用MenuItem,包含三个参数,官方文档描述如下:
代码:
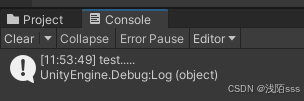
[MenuItem("Tool/test")]public static void test(){Debug.Log("test.....");}结果:

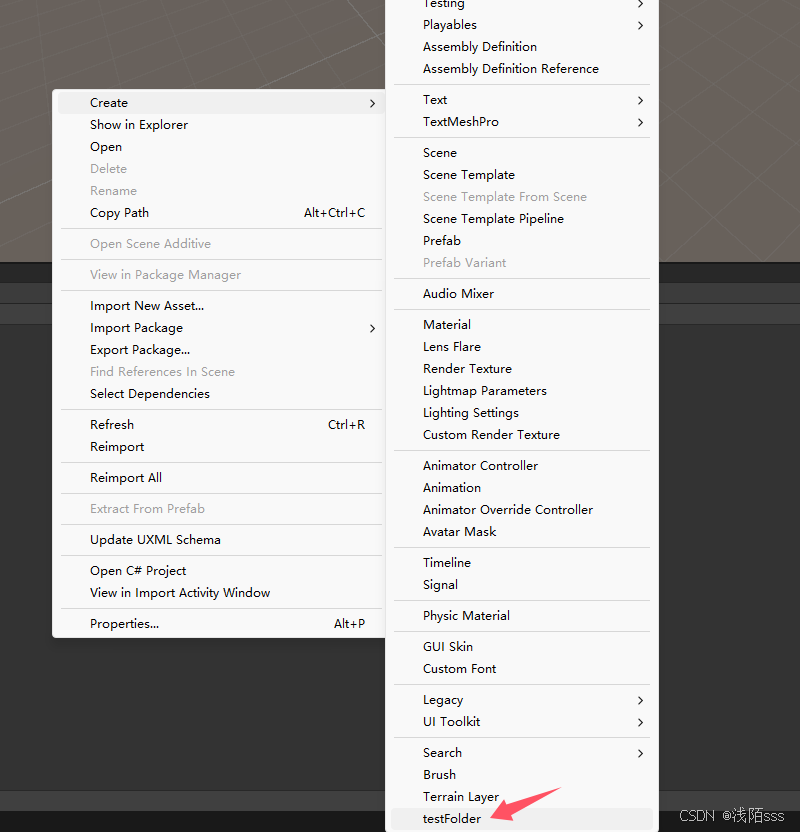
2.增加右键Create菜单栏选项
使用MenuItem,ItemName需要从"Assets"开始,比如需要在Create菜单栏加一个testFolder的函数
代码:
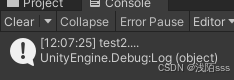
[MenuItem("Assets/Create/testFolder")]public static void test2(){Debug.Log("test2....");}结果:
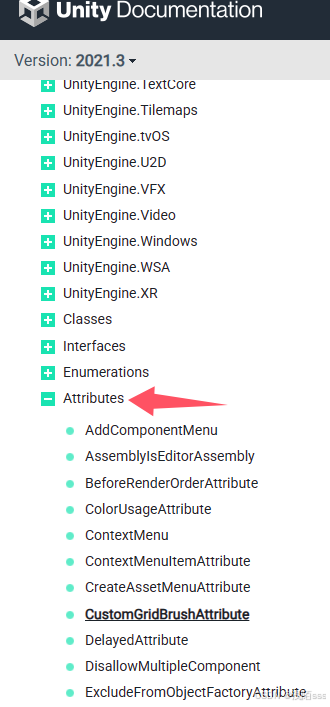
更多Unity支持的编辑器特性,可查看官方API,地址:
CustomGridBrushAttribute - Unity 脚本 API
3.使用快捷键
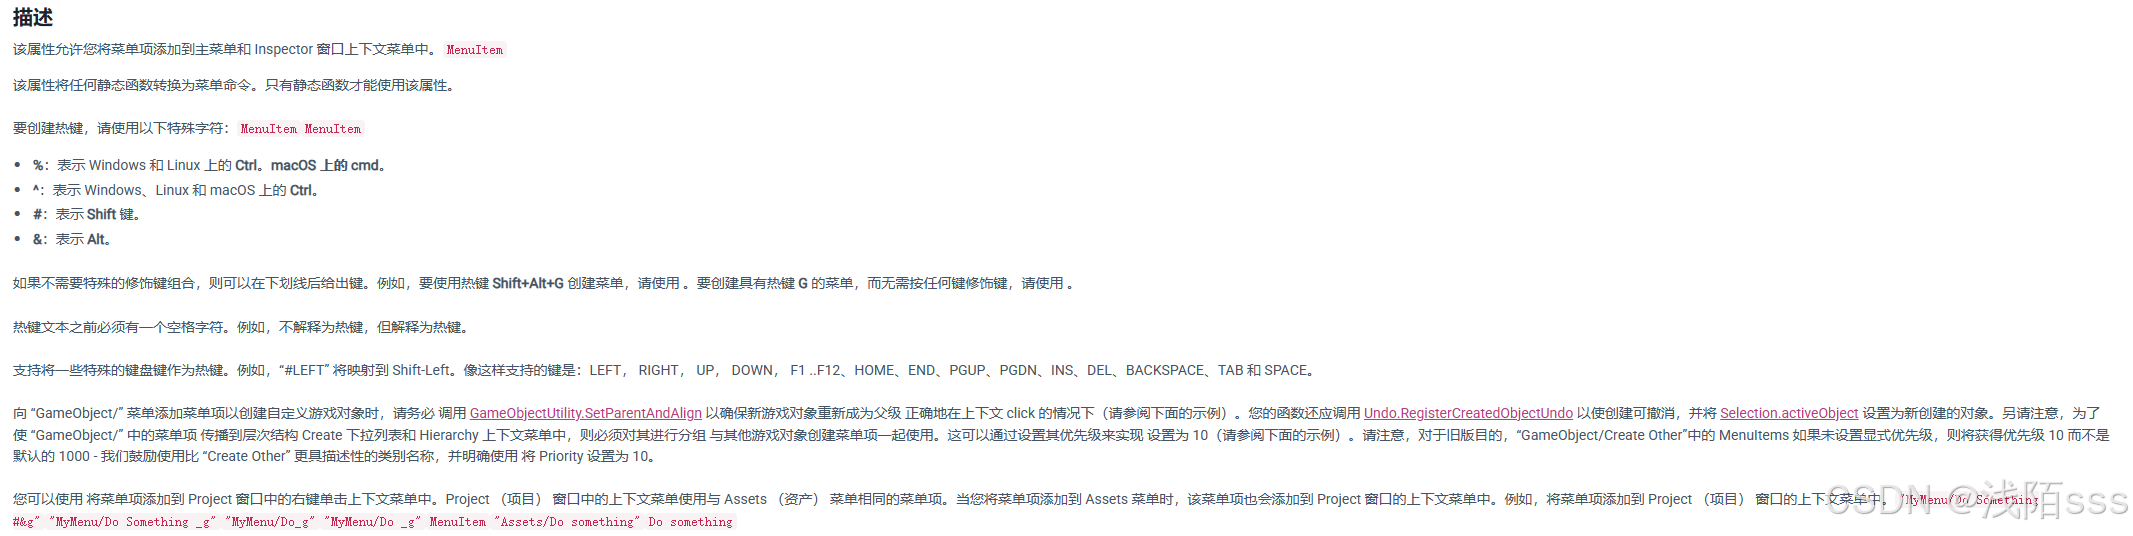
官方文档的MenuItem中使用快捷键描述如下:
官方文档链接:
Unity - 脚本 API:MenuItem (unity3d.com)
热键文本之前必须有一个空格字符:
代码:
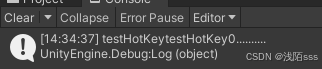
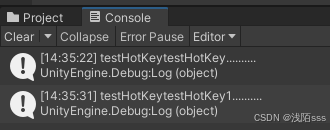
[MenuItem("Tool/testHotKey0 _g")]public static void testHotKey0(){Debug.Log("testHotKeytestHotKey0..........");}结果:
![]()
如果不需要特殊的修饰键组合,则可以在下划线后给出键:
代码:
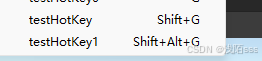
[MenuItem("Tool/testHotKey #g")]public static void testHotKey(){Debug.Log("testHotKeytestHotKey..........");}[MenuItem("Tool/testHotKey1 #&g")]public static void testHotKey1(){Debug.Log("testHotKeytestHotKey1..........");}结果:
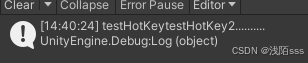
支持将一些特殊的键盘键(LEFT, RIGHT, UP, DOWN, F1 ..F12、HOME、END、PGUP、PGDN、INS、DEL、BACKSPACE、TAB 和 SPACE)作为热键:
代码:
[MenuItem("Tool/testHotKey2 #LEFT")]public static void testHotKey2(){Debug.Log("testHotKeytestHotKey2..........");}结果:
![]()
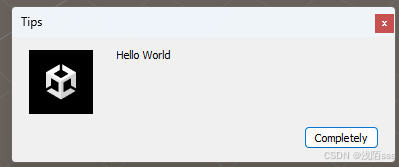
4.弹出一个提示窗口
使用EditorUtility.DisplayDialog显示窗口,第一个参数是弹窗名,第二个参数是提示内容,第三个参数是按钮名字
代码:
[MenuItem("Tool/testDialog")]public static void DisplayDialog(){EditorUtility.DisplayDialog("Tips", "Hello World", "Completely");}结果:
二、自定义窗口扩展
1.创建自定义窗口
自定义窗口需要创建的窗口脚本继承子EditorWindow,然后在OnGUI中渲染窗口的实际内容,
新建一个TestWindow脚本,代码如下:
public class TestWindow : EditorWindow
{private void OnGUI(){//渲染窗口的实际内容}
}
编写打开窗口的函数,代码如下:
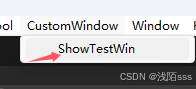
[MenuItem("CustomWindow/ShowTestWin")]
public static void ShowWindow()
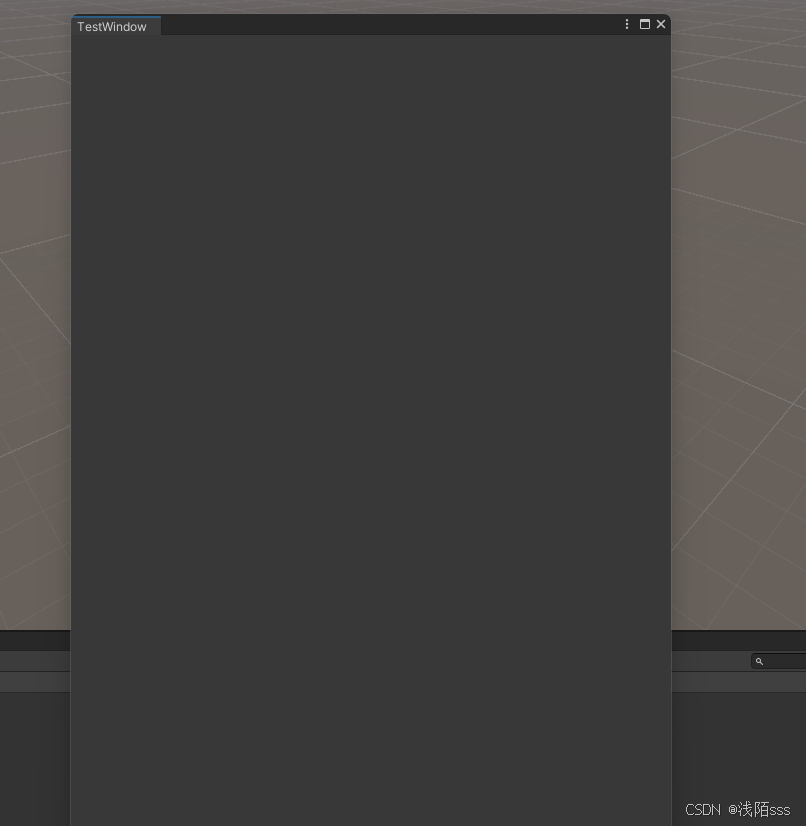
{//显示窗口实例//EditorWindow.GetWindow(typeof(TestWindow));//显示窗口按照自定位置和大小,比如(0,0)点,宽600,长800EditorWindow.GetWindowWithRect<TestWindow>(new Rect(new Vector2(0,0),new Vector2(600,800)));
}
结果:
EditorWindow类中的方法:
官方文档描述如下:
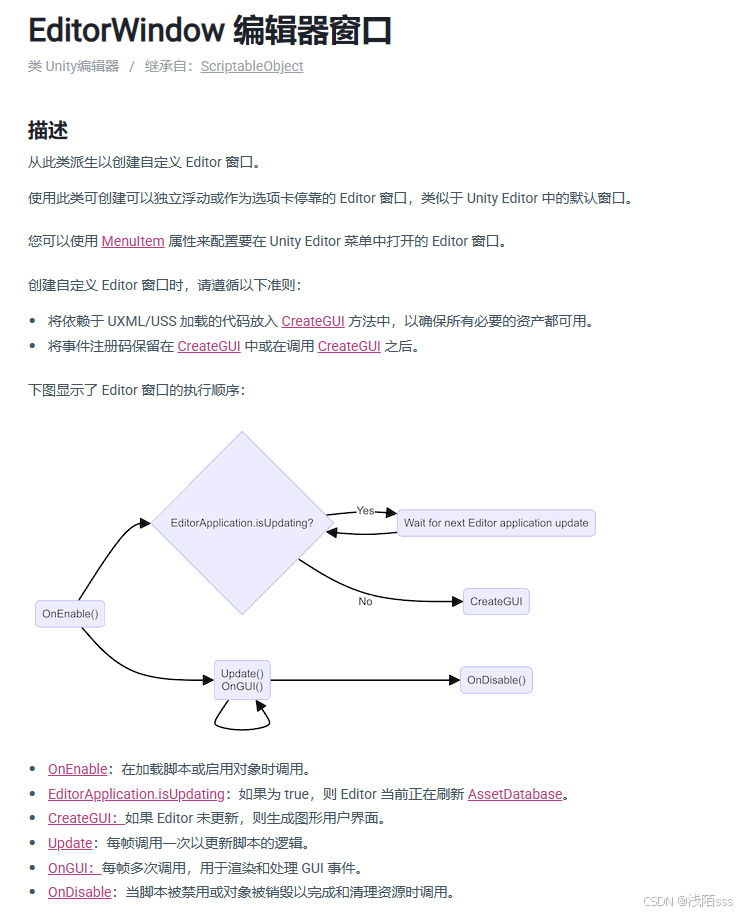
更多方法可参考:Unity - 脚本 API:EditorWindow (unity3d.com)
代码:
public class TestWindow : EditorWindow
{[MenuItem("CustomWindow/ShowTestWin")]public static void ShowWindow(){//显示窗口实例,可以使用鼠标更改大小//EditorWindow.GetWindow(typeof(TestWindow));//显示窗口按照自定位置和大小,比如(0,0)点,宽600,长800,不可以使用鼠标更改大小EditorWindow.GetWindowWithRect<TestWindow>(new Rect(new Vector2(0,0),new Vector2(600,800)));}private void OnEnable(){//在加载脚本或者启用对象时调用Debug.Log("OnEnable");}private void CreateGUI(){//如果Editor未更新,则生成图形用户界面Debug.Log("CreateGUI");}private void Update(){//每帧调用一次以更新脚本的逻辑Debug.Log("Updaete");}private void OnDisable(){//当脚本被禁用或者对象被销毁以完成和清理资源时调用Debug.Log("OnDisable");}private void OnGUI(){//每帧多次调用,用于渲染和处理GUI事件//渲染窗口的实际内容Debug.Log("OnGUI");}
}
结果:

2.增加窗口内容
1.使用EditorGUI类
1.actionKey
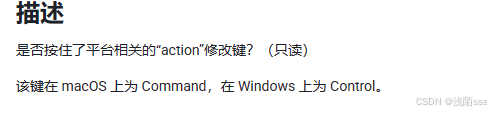
使用代码:
private void OnGUI(){//渲染窗口的实际内容if (EditorGUI.actionKey){//是否按住了平台相关的“action”修改键?(只读),该键在 macOS 上为 Command,在 Windows 上为 ControlDebug.Log("按下了actionKey");}}结果:
![]()
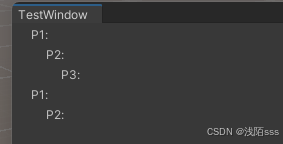
2.indentLevel
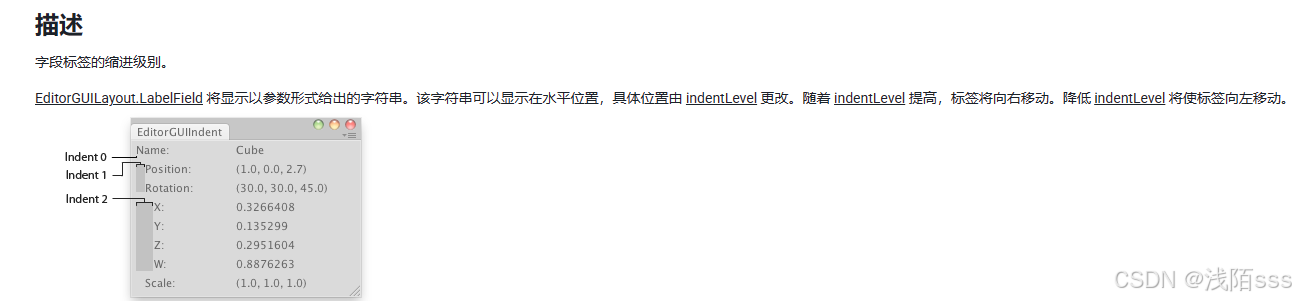
使用代码:
private void OnGUI(){//渲染窗口的实际内容//使用indentLevel缩进文本EditorGUI.indentLevel++;EditorGUILayout.LabelField("P1:");EditorGUI.indentLevel++;EditorGUILayout.LabelField("P2:");EditorGUI.indentLevel++;EditorGUILayout.LabelField("P3:");EditorGUI.indentLevel--;EditorGUI.indentLevel--;EditorGUILayout.LabelField("P1:");EditorGUI.indentLevel++;EditorGUILayout.LabelField("P2:");}结果:
3.showMixedValue

具体作用可以看下面两篇文章
EditorGUI.showMixedValue 什么都不做?- Unity 引擎 - Unity 讨论
Unity - 脚本 API:EditorGUI.showMixedValue (unity3d.com)
就是可以让在 GUI 中以非标准方式表示值,同时支持多对象编辑,也就是通过设置此值为true,让枚举值没有在面板选择值时显示为![]()
代码:
private void OnGUI(){//渲染窗口的实际内容EditorGUI.showMixedValue = true;// 将isFast布尔值转换为enum值SpeedOption speedOptionEnumValue = SpeedOption.Fast;// 在下拉菜单中显示枚举值:speedOptionEnumValue = (SpeedOption)EditorGUILayout.EnumPopup("Speed", speedOptionEnumValue);// 将showMixedValue设置为false,这样它就不会影响以下控件(如果有的话):EditorGUI.showMixedValue = false;}结果:
![]()
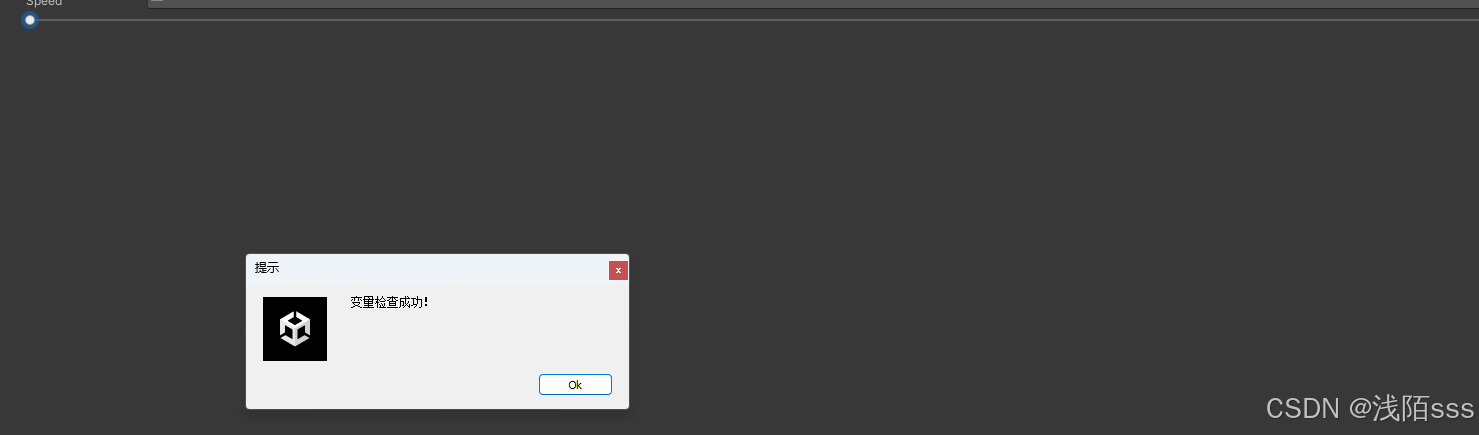
4.BeginChangeCheck,EndChangeCheck

EndChangeCheck返回值如下![]()
代码:
float value = 0;
private void OnGUI()
{//渲染窗口的实际内容EditorGUI.BeginChangeCheck();value = EditorGUILayout.Slider(value, 0, 1);if (EditorGUI.EndChangeCheck()){this.ShowTips("变量检查成功!");}
}
结果:
5.BeginDisabledGroup,EndDisabledGroup

BeginChangeCheck参数如下:
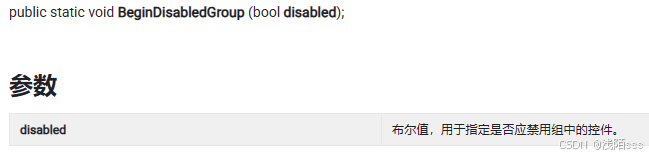
使用这两个API可以禁用执行在其中间的多个组件。
代码:
private void OnGUI(){//渲染窗口的实际内容EditorGUI.BeginDisabledGroup(false);EditorGUI.TextField(new Rect(new Vector2(0,150),new Vector2(300,50)), "TestDisabledGroup");EditorGUI.DropdownButton(new Rect(new Vector2(300, 150), new Vector2(100, 50)),this.titleContent,FocusType.Keyboard);EditorGUI.EndDisabledGroup();}结果:
当BeginDisabledGroup传入值为false时,

当BeginDisabledGroup传入值为true时,

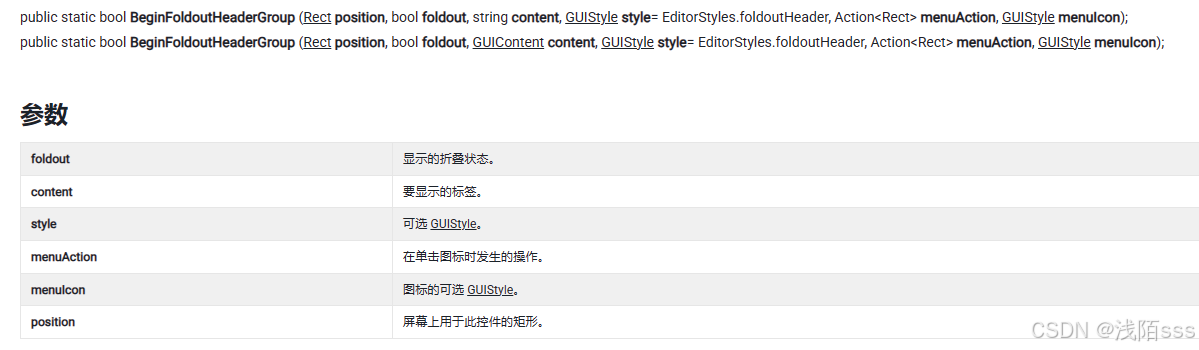
6.BeginFoldoutHeaderGroup,EndFoldoutHeaderGroup

BeginFoldoutHeaderGroup参数如下:
代码:
public void TestFoldoutHeaderGroup()
{isShow = EditorGUI.BeginFoldoutHeaderGroup(new Rect(new Vector2(0, 200), new Vector2(120, 50)), isShow, "TEST Folder", null, ShowHeaderContextMenu);if (isShow){if (Selection.activeTransform){Selection.activeTransform.position = EditorGUI.Vector3Field(new Rect(0, 220, 200, 100), "Position", Selection.activeTransform.position);}else{EditorGUI.LabelField(new Rect(0, 220, 200, 20),"请先选中一个物体!");}}EditorGUI.EndFoldoutHeaderGroup();
}Color mColor;
void ShowHeaderContextMenu(Rect position)
{isShow = !isShow;GenericMenu menu = new GenericMenu();menu.AddItem(new GUIContent("RGB/Red"), mColor.Equals(Color.red), (color) =>{ mColor = (Color)color; },Color.red);menu.AddItem(new GUIContent("RGB/Black"), mColor.Equals(Color.black), (color) => { mColor = (Color)color; }, Color.black);menu.AddItem(new GUIContent("RGB/White"), mColor.Equals(Color.white), (color) => { mColor = (Color)color; }, Color.white);menu.ShowAsContext();
}
结果:

生成上图中的一个UI元素,左边的![]() 可以通过foldout控制,控制显示下面需要显示的信息
可以通过foldout控制,控制显示下面需要显示的信息
 右边
右边![]() 可以选择执行方法,比如上述代码中,点击
可以选择执行方法,比如上述代码中,点击![]() 就可以显示一个菜单,如下:
就可以显示一个菜单,如下:

7.BeginProperty,EndProperty

BeginProperty参数如下:

8.文本字段(xxxField)
以下API都是在面板中创建一个字段显示,故放在一起整理:
BoundsField

BoundsIntField

ColorField

CurveField

EnumFlagsField

DoubleField,FloatField,IntField,LongField
描述:创建一个用于输入双精度浮点数、单精度浮点数、整数、长整数的字段
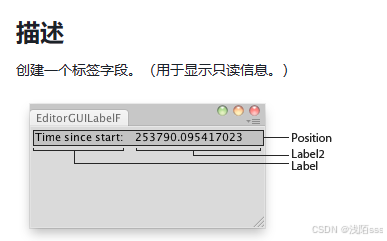
LabelField
LayerField

GradientField

MaskField

MultiFloatField

MultiIntField
MultiPropertyField
注:使用此方法必须在使用前获取一下 SerializedProperty,否则会报错如下:
![]()
ObjectField
PasswordField
PropertyField

RectField

RectIntField

TagField

TextField

Vector2Field

Vector2IntField

Vector3Field

Vector3IntField

Vector4Field

DelayedDoubleField

DelayedFloatField

DelayedIntField

DelayedTextField

代码:
private void OnEnable(){//在加载脚本或者启用对象时调用MonsterData m = ScriptableObject.CreateInstance<MonsterData>();mMonsterData = new UnityEditor.SerializedObject(m);mAtt = mMonsterData.FindProperty("att1");mObj = mMonsterData.FindProperty("obj");AttData m1 = ScriptableObject.CreateInstance<AttData>();mAttData = new UnityEditor.SerializedObject(m1);mAtt1 = mAttData.FindProperty("a1");} [Serializable]public class Attribute{public float hp;public float maxhp;public float mp;public float maxmp;}[Serializable]public class MonsterData : ScriptableObject{public Attribute att1;public GameObject obj;public MonsterData(){this.att1 = new Attribute();}}SerializedObject mMonsterData;SerializedObject mAttData;[Serializable]public class AttData : ScriptableObject{public int a1 = 1;public int a2 = 2;public int a3 = 3;public int a4 = 4;}SerializedProperty mAtt;SerializedProperty mAtt1;SerializedProperty mObj;public void TestField(){//BoundsField 用于输入Bounds的Center和Extents字段EditorGUI.BoundsField(new Rect(0,300,250,50), "BoundsField", new Bounds(Vector3.zero,Vector3.one));//BoundsIntField 用于输入BoundsInt的Position和Size字段EditorGUI.BoundsIntField(new Rect(0,360,250,50), "BoundsIntField", new BoundsInt(Vector3Int.zero,Vector3Int.one));//ColorField 用于选择Color字段EditorGUI.ColorField(new Rect(0,430,100,20), "ColorField ", Color.white);//CurveField 用于编辑AnimationCurve的字段EditorGUI.CurveField(new Rect(0,460,250,20), "CurveField", new AnimationCurve());//EnumFlagsField EditorGUI.EnumFlagsField(new Rect(0,490,200,20), "EnumFlagsField", SpeedOption.Fast);//DoubleField 用于输入双精度浮点数的字段EditorGUI.DoubleField(new Rect(0,520,200,20), "DoubleField", 0);//FloatField 用于输入浮点数的文本字段EditorGUI.FloatField(new Rect(0,550,200,20), "FloatField", 0);//IntField 用于输入整数的字段EditorGUI.IntField(new Rect(0,580,200,20), "IntField", 0);//LongField 用于输入长整数的字段EditorGUI.LongField(new Rect(0, 610, 200, 20), "LongField", 0);//LabelField 创建一个标签字段EditorGUI.LabelField(new Rect(0, 640, 100, 20), "这是一个标签");//LayerField 创建一个层选择字段EditorGUI.LayerField(new Rect(0, 670, 250, 20), "LayerField", 0);//GradientField 创建一个用于编辑Gradient的字段EditorGUI.GradientField(new Rect(0, 700, 250, 20), "GradientField", new Gradient());//MaskField 创建一个掩码字段EditorGUI.MaskField(new Rect(0,730,100,20), "MaskField", 0,new string[] {"player","enemy","npc"});//MultiFloatField 同一行输入多个浮点值EditorGUI.MultiFloatField(new Rect(0, 760, 200, 20),new GUIContent("MultiFloatField"), new GUIContent[] {new GUIContent("第一个"),new GUIContent("第二个")}, new float[] {2.5f,3.0f});//MultiIntField 同一行输入多个整数EditorGUI.MultiIntField(new Rect(0, 810, 200, 20),new GUIContent[] { new GUIContent("第一个"), new GUIContent("第二个") }, new int[] { 6, 100 });//MultiPropertyField 同一行包含多个属性,标签数组决定显示的属性数量。使用的属性不应超过4个mAtt1 = mAttData.FindProperty("a1");//mAtt = mMonsterData.FindProperty("att1");EditorGUI.MultiPropertyField(new Rect(0,830,300,20), new GUIContent[] { new GUIContent("第一个"), new GUIContent("第二个"), new GUIContent("第三个"), new GUIContent("第四个") },mAtt1, new GUIContent("MultiPropertyField"));//ObjectField 创建一个对象字段,可以通过拖放对象或者使用对象选择器选择对象来分配对象EditorGUI.ObjectField(new Rect(0,870,250,20),mObj);//PasswordField 创建一个输入密码的字段EditorGUI.PasswordField(new Rect(0,900,250,20),"这是一个密码","ssssss");//PropertyField 针对SerializedProperty 创建一个字段EditorGUI.PropertyField(new Rect(0,930,200,20),mAtt,new GUIContent("这是一个属性字段"),true);//RectField 创建用于输入Rect的xywh的字段EditorGUI.RectField(new Rect(300,880,200,20),"这是一个Rect字段",new Rect(0,0,200.0f,200.0f));//RectIntField 创建用于输入RectInt的xywh的字段EditorGUI.RectIntField(new Rect(300,810,200,20),"这是一个RectInt字段",new RectInt(0,0,200,200));//TagField 创建标签选择字段EditorGUI.TagField(new Rect(600,880,250,20),"这是一个标签选择字段","player");//TextField 创建一个文本字段EditorGUI.TextField(new Rect(600,810,250,20),"这是一个文本字段","请输入。。。");//Vector2Field 输入Vector2的xy字段EditorGUI.Vector2Field(new Rect(0, 1030, 200, 20), "这是一个Vector2字段", Vector2.zero);//Vector2IntField 输入Vector2Int的xy字段EditorGUI.Vector2IntField(new Rect(0, 1070, 200, 20), "这是一个Vector2Int字段", Vector2Int.zero);//Vector3Field 输入Vector3的xyz字段EditorGUI.Vector3Field(new Rect(0, 1110, 200, 20), "这是一个Vector3字段", Vector3.zero);//Vector3IntField 输入Vector3Intd的xyz字段EditorGUI.Vector3IntField(new Rect(0, 1150, 200, 20), "这是一个Vector3Int字段", Vector3Int.zero);//Vector4Field 输入Vector4的xyzw字段EditorGUI.Vector4Field(new Rect(0, 1190, 200, 20), "这是一个Vector4字段", Vector4.zero);//DelayedDoubleField 创建一个用于输入双精度浮点数的延迟文本字段EditorGUI.DelayedDoubleField(new Rect(300,990,200,20),"这是一个Double延迟文本字段",20);//DelayedFloatField 创建一个用于输入浮点数的延迟文本字段 EditorGUI.DelayedFloatField(new Rect(300, 1030, 200, 20), "这是一个Float延迟文本字段", 20);//DelayedIntField 创建一个用于输入整数的延迟文本字段EditorGUI.DelayedIntField(new Rect(300, 1070, 200, 20), "这是一个Int延迟文本字段", 20);//DelayedTextField 创建一个用于输入延迟文本字段EditorGUI.DelayedTextField(new Rect(300, 1110, 200, 20), "这是一个文本延迟文本字段", "");}结果:

9.CanCacheInspectorGUI

10.DrawPreviewTexture

代码:
Texture texture;private void OnEnable(){//在加载脚本或者启用对象时调用texture = AssetDatabase.LoadAssetAtPath<Texture>("Assets/Art/bg_window.png");}public void TestDrawPreviewTexture(){EditorGUI.LabelField(new Rect(600, 880, 200, 200), "在矩形内绘制纹理");//在矩形内绘制纹理EditorGUI.DrawPreviewTexture(new Rect(600, 990, 200, 200), texture);}结果:

11.DrawRect

代码:
public void TestDrawRect(){EditorGUI.LabelField(new Rect(900, 880, 250, 200), "在窗口指定位置绘制一个指定颜色的矩形");//在窗口指定位置绘制一个指定颜色的矩形EditorGUI.DrawRect(new Rect(900, 990, 200, 200),Color.red);} 结果:

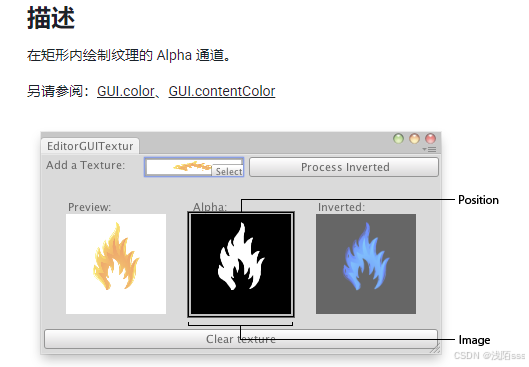
12.DrawTextureAlpha
代码:
Texture texture;private void OnEnable(){//在加载脚本或者启用对象时调用texture = AssetDatabase.LoadAssetAtPath<Texture>("Assets/Art/bg_window.png");} public void TestDrawTextureAlpha(){//在矩形内绘制纹理的Alpha通道EditorGUI.LabelField(new Rect(300, 480, 200, 200), "在矩形内绘制纹理的Alpha通道");EditorGUI.DrawTextureAlpha(new Rect(300, 590, 200, 200),texture);}结果:

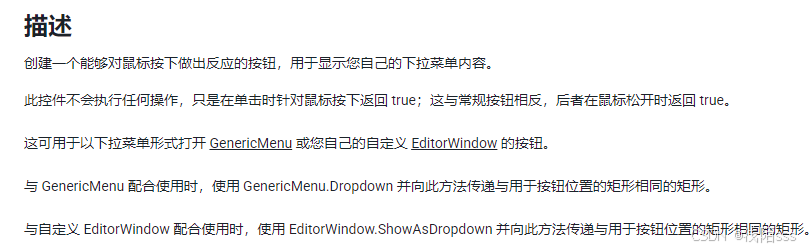
13.DropdownButton
代码:
public void TestDropdownButton(){//用于显示自己的下拉菜单内容if(EditorGUI.DropdownButton(new Rect(900, 590, 200, 200),new GUIContent("TEST"), FocusType.Keyboard)){GenericMenu genericMenu = new GenericMenu();genericMenu.AddItem(new GUIContent("test1"), true, () => { });genericMenu.AddItem(new GUIContent("test2"), false, () => { });genericMenu.AddItem(new GUIContent("test3"), false, () => { });genericMenu.AddItem(new GUIContent("test4"), false, () => { });genericMenu.AddItem(new GUIContent("test5"), false, () => { });genericMenu.DropDown(new Rect(950,410, 400, 200));}} 结果:

14.DropShadowLabel
代码:
public void TestDropShadowLabel(){//绘制带有投影的标签EditorGUI.DropShadowLabel(new Rect(900, 650, 200, 200),"这是一个阴影文字",new GUIStyle() { fontSize = 30});}结果:
![]()
15.EnumPopup,IntPopup,Popup
创建一个枚举、整型、通用弹出字段
代码:
public enum PopUpEnum{first,second, third, fourth,}public void TestPopup(){EditorGUI.EnumPopup(new Rect(300,200,200,20),PopUpEnum.fourth);EditorGUI.IntPopup(new Rect(300,230,200,20),0,new GUIContent[] {new GUIContent("第一个"),new GUIContent("第二个")},new int[] {0,1}); ;EditorGUI.Popup(new Rect(300, 260, 200, 20),0, new GUIContent[] { new GUIContent("One"), new GUIContent("Two") });}结果:

16.FocusTextInControl

17.Foldout

代码:
bool _isShow = false;public void TestFoldout(){_isShow = EditorGUI.Foldout(new Rect(300, 290, 200, 20), _isShow, "testFoldout");if (_isShow){if (Selection.activeTransform){Selection.activeTransform.position = EditorGUI.Vector3Field(new Rect(300, 310, 200, 100), "Position", Selection.activeTransform.position);}else{EditorGUI.LabelField(new Rect(300, 310, 200, 20), "请先选中一个物体!");}}}结果:

18.GetPropertyHeight

代码:
public void TestGetPropertyHeight(){//获取 PropertyField 控件所需的高度。float h = EditorGUI.GetPropertyHeight(mAtt, true);} 结果:

19.HandlePrefixLabel

代码:
public void TestHandlePrefixLabel(){//EditorGUI.LabelField(new Rect(300, 322, 200, 10),"testLabel");EditorGUI.HandlePrefixLabel(new Rect(300, 520, 200, 20), new Rect(300, 322, 200, 20), new GUIContent("testHandlePrefixLabel"));}结果:
![]()
20.PrefixLabel
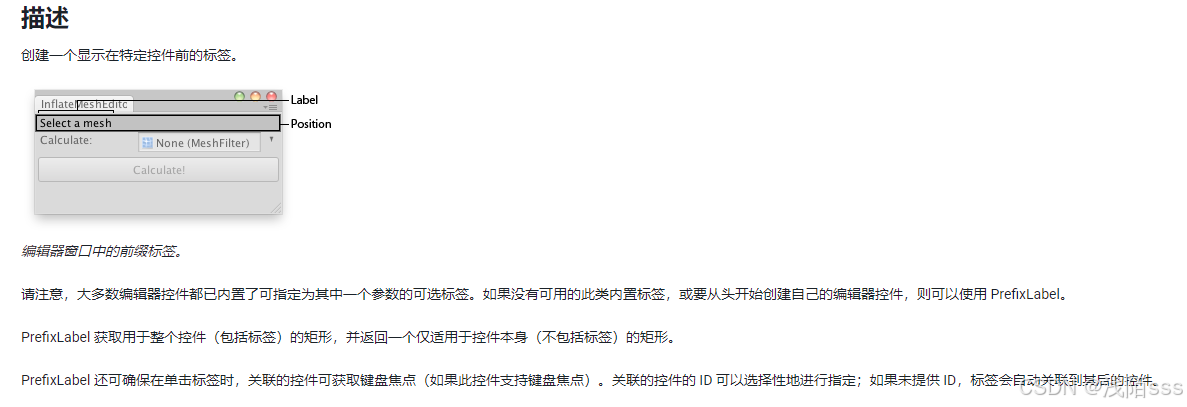
参数:

代码:
public void TestPrefixLabel(){EditorGUI.PrefixLabel(new Rect(600, 180, 200, 20), new GUIContent("testPrefixLabel"));}结果:

21.HelpBox

代码:
public void TestHelpBox(){EditorGUI.HelpBox(new Rect(300, 350, 200, 20),"测试HelpBox",MessageType.Warning);}结果:
![]()
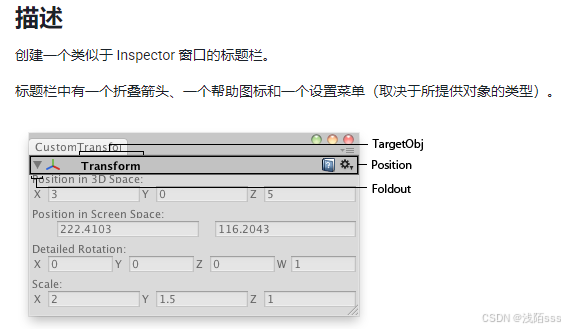
22.InspectorTitlebar
23.IntSlider,Slider,MinMaxSlider(已弃用)
创建一个滑动条,用户可以进行拖动以在最小值和最大值之间更改整数值。
代码:
int valueInt = 0;float valueFloat = 50.8f;public void TestSlider(){valueInt = EditorGUI.IntSlider(new Rect(300, 410, 200, 20),valueInt,0,100);valueFloat = EditorGUI.Slider(new Rect(300, 440, 200, 20), valueFloat, 0, 100);//弃用的//EditorGUI.MinMaxSlider();}结果:

24.LinkButton
代码:
public void TestLinkButton(){if(EditorGUI.LinkButton(new Rect(900, 200, 200, 20), "TestLinkButton")){Application.OpenURL("Www.baidu.com");}}结果:

25.ProgressBar
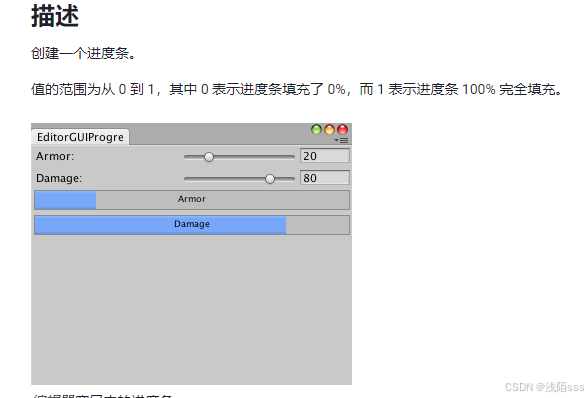
代码:
float processValue = 0;public void TestProgressBar(){EditorGUI.ProgressBar(new Rect(600, 200, 200, 20),processValue, "testProgressBar");}结果:

26.SelectableLabel

代码:
public void TestSelectableLabel(){EditorGUI.SelectableLabel(new Rect(600, 230, 200, 20), "testSelectableLabel");}结果:
![]()
27.TextArea
代码:
string inputTxt = "请输入。。。";public void TestTextArea(){inputTxt = EditorGUI.TextArea(new Rect(600, 260, 200, 20), inputTxt);} 结果:
![]()
28.Toggle,ToggleLeft
创建一个开关
代码:
bool toglevalue = false;bool toggleLeftValue = false;public void TestToggle(){toglevalue = EditorGUI.Toggle(new Rect(600, 290, 200, 20), "testToggle", toglevalue);toggleLeftValue = EditorGUI.ToggleLeft(new Rect(600, 320, 200, 20), "testToggleLeft", toggleLeftValue);}结果:

2.使用EditorGUILayout类
与EditorGUI不相同的API部分:
相同的部分:
与EditorGUI类中的方法用法一致。
3.使用GUI类:
4.使用GUILayaout类:
三、自定义Inspectors面板扩展
1.建立一个脚本面板扩展的编辑器脚本
新建一个TestEditorInspector脚本,用于自定义物体上的TestData脚本的Inspector面板

TestEditorInspector需要继承自Editor类,通过CustomEditor特性将编辑器脚本与脚本组件关联
代码:
[CustomEditor(typeof(TestData))]
public class TestEditorInspector : Editor
{public override void OnInspectorGUI(){base.OnInspectorGUI();//自定义Inspector内容}
}
2.增加面板内容
1.使用EditorGUI类(同上)
2.使用EditorGUILayout类(同上)
3.使用GUI类(同上)
4.使用GUILayaout类(同上)
参考:
《Extending Unity with Editor Scripting》
扩展编辑器 - Unity 手册 (unity3d.com)
EditorWindow - Unity 脚本 API
Unity - 手动:使用 C# 脚本创建自定义 Editor 窗口 (unity3d.com)