开发自定义starter
环境:Spring Cloud Gateway
需求:防止用户绕过网关直接访问服务器,用户只需引入依赖即可。
1、创建项目
首先创建一个spring boot项目

2、配置pom.xml
<?xml version="1.0" encoding="UTF-8"?>
<project xmlns="http://maven.apache.org/POM/4.0.0" xmlns:xsi="http://www.w3.org/2001/XMLSchema-instance"xsi:schemaLocation="http://maven.apache.org/POM/4.0.0 https://maven.apache.org/xsd/maven-4.0.0.xsd"><modelVersion>4.0.0</modelVersion><parent><groupId>org.springframework.boot</groupId><artifactId>spring-boot-starter-parent</artifactId><version>2.7.15</version><relativePath/> <!-- lookup parent from repository --></parent><groupId>io.github.lanxiu-code</groupId><artifactId>security-spring-boot-starter</artifactId><version>1.0.0</version><name>security-spring-boot-starter</name><description>security-spring-boot-starter</description><url>https://github.com/lanxiu-code/security-spring-boot-starter</url><licenses><license><name>The Apache Software License, Version 2.0</name><url>http://www.apache.org/licenses/LICENSE-2.0.txt</url></license></licenses><developers><developer><id>lanxiu</id><name>lanxiu</name><email>3403138527@qq.com</email><roles><role>Project Manager</role><role>Architect</role></roles></developer></developers><scm><connection>https://github.com/lanxiu-code/security-spring-boot-starter.git</connection><developerConnection>scm:git:ssh://git@github.com:lanxiu-code/security-spring-boot-starter.git</developerConnection><url>https://github.com/lanxiu-code/security-spring-boot-starter</url></scm><properties><java.version>1.8</java.version><project.build.sourceEncoding>UTF-8</project.build.sourceEncoding></properties><dependencies><dependency><groupId>org.projectlombok</groupId><artifactId>lombok</artifactId><optional>true</optional></dependency><dependency><groupId>org.springframework.boot</groupId><artifactId>spring-boot-starter</artifactId></dependency><dependency><groupId>org.springframework.boot</groupId><artifactId>spring-boot-starter-web</artifactId></dependency><!-- 提供了自动装配功能--><dependency><groupId>org.springframework.boot</groupId><artifactId>spring-boot-autoconfigure</artifactId></dependency><dependency><groupId>org.springframework.boot</groupId><artifactId>spring-boot-configuration-processor</artifactId><optional>true</optional></dependency></dependencies><build><plugins><plugin><groupId>org.apache.maven.plugins</groupId><artifactId>maven-compiler-plugin</artifactId><configuration><source>${java.version}</source><target>${java.version}</target></configuration></plugin><plugin><groupId>org.springframework.boot</groupId><artifactId>spring-boot-maven-plugin</artifactId><configuration><skip>true</skip></configuration></plugin><!-- central发布插件 --><plugin><groupId>org.sonatype.central</groupId><artifactId>central-publishing-maven-plugin</artifactId><version>0.4.0</version><extensions>true</extensions><configuration><publishingServerId>lanxiu</publishingServerId><tokenAuth>true</tokenAuth></configuration></plugin><!-- source源码插件 --><plugin><groupId>org.apache.maven.plugins</groupId><artifactId>maven-source-plugin</artifactId><executions><execution><id>attach-sources</id><goals><goal>jar-no-fork</goal></goals></execution></executions></plugin><!-- javadoc插件 --><plugin><groupId>org.apache.maven.plugins</groupId><artifactId>maven-javadoc-plugin</artifactId><version>2.9.1</version><executions><execution><id>attach-javadocs</id><goals><goal>jar</goal></goals></execution></executions></plugin><plugin><groupId>org.apache.maven.plugins</groupId><artifactId>maven-gpg-plugin</artifactId><version>1.6</version><configuration><executable>D:\software\GPG\GnuPG\bin\gpg.exe</executable><keyname>lanxiu-code</keyname></configuration><executions><execution><id>sign-artifacts</id><phase>verify</phase><goals><goal>sign</goal></goals></execution></executions></plugin></plugins></build></project>- spring-boot-configuration-processor:给用户提示配置

- spring-boot-autoconfigure:自动装配功能
3、配置yml
spring:application:name: security-spring-boot-startersecurity:gateway:only-gateway: true# 认证字段auth-key: auth# 认证值auth-value: gateway4、SecurityConfig配置类
package com.lx.security.config;import com.lx.security.constant.SecurityConstant;
import lombok.Data;
import org.springframework.boot.context.properties.ConfigurationProperties;
import org.springframework.context.annotation.ComponentScan;
import org.springframework.context.annotation.Configuration;@Data
@Configuration
@ConfigurationProperties(prefix = "security.gateway")
public class SecurityConfig {/** 是否只能通过网关请求服务器* */private Boolean onlyGateway = Boolean.TRUE;/** 认证字段* */private String authKey = SecurityConstant.AUTH_KEY;/** 认证值* */private String authValue = SecurityConstant.AUTH_VALUE;
}
5、ServerProtectInterceptor拦截器
package com.lx.security.interceptor;import com.lx.security.config.SecurityConfig;
import com.lx.security.constant.SecurityConstant;
import com.lx.security.utils.WebUtils;
import lombok.extern.slf4j.Slf4j;
import org.springframework.http.HttpStatus;
import org.springframework.stereotype.Component;
import org.springframework.web.servlet.HandlerInterceptor;
import javax.annotation.Resource;
import javax.servlet.http.HttpServletRequest;
import javax.servlet.http.HttpServletResponse;@Component
@Slf4j
public class ServerProtectInterceptor implements HandlerInterceptor {@Resourceprivate SecurityConfig securityConfig;@Overridepublic boolean preHandle(HttpServletRequest request, HttpServletResponse response, Object handler) throws Exception {if (!securityConfig.getOnlyGateway()){return true;}String auth = request.getHeader(securityConfig.getAuthKey());if(securityConfig.getAuthValue().equals(auth)){return true;}else{//String result = "{\"code\":403,\"data\":null,\"message\":\"非法请求\"}";WebUtils.render(response, HttpStatus.FORBIDDEN.value());return false;}}}
WebRequestInterceptor 和 HandlerInterceptor 都是 Spring 框架提供的拦截器机制的一部分,但它们在使用场景和生命周期上有一定的区别:
- 应用范围:
- WebRequestInterceptor 是一个更通用的拦截器接口,它可以应用于任何类型的请求(如 HTTP 请求)。
- HandlerInterceptor 则专门用于 Web MVC 应用中的控制器方法调用前后。
- 生命周期:
- WebRequestInterceptor 的方法包括 preHandle, postHandle 和 afterCompletion,但它的 preHandle 方法是在请求处理之前调用,而 postHandle 和 afterCompletion 则分别在请求处理之后和视图渲染之后调用。
- HandlerInterceptor 同样有 preHandle, postHandle 和 afterCompletion 方法,但是这些方法更加专注于 MVC 控制器的生命周期管理。
6、WebMvcConfig配置拦截器
package com.lx.security.config;import com.lx.security.interceptor.ServerProtectInterceptor;
import org.springframework.context.annotation.Bean;
import org.springframework.context.annotation.Configuration;
import org.springframework.web.servlet.config.annotation.InterceptorRegistry;
import org.springframework.web.servlet.config.annotation.WebMvcConfigurer;
import javax.annotation.Resource;@Configuration
public class WebMvcConfig implements WebMvcConfigurer {@Resourceprivate ServerProtectInterceptor serverProtectInterceptor;@Overridepublic void addInterceptors(InterceptorRegistry registry) {registry.addInterceptor(serverProtectInterceptor);}
}
7、SecurityAutoConfiguration自动装配类
package com.lx.security;import org.springframework.boot.autoconfigure.condition.ConditionalOnProperty;
import org.springframework.boot.context.properties.EnableConfigurationProperties;
import org.springframework.context.annotation.ComponentScan;
import org.springframework.context.annotation.Configuration;@Configuration
@ComponentScan("com.lx.security")
@ConditionalOnProperty(prefix = "security.gateway", name = "only-gateway", havingValue = "true")
@EnableConfigurationProperties
public class SecurityAutoConfiguration {}
@ConditionalOnProperty注解,它的作用是根据某个条件类决定是否自动配置,例如上面的意思是如果only-gateway和havingValue的值相同就会加载配置,否则不加载,如果配置了matchIfMissing = true,即使没有配置yml也会加载配置。
但是这个@ConditionalOnProperty注解有个坑,花了我一天才解决:
项目中的配置名称必须和条件注解@ConditionalOnProperty中的name一致。如果@ConditionalOnProperty中的name是驼峰的话(onlyGateway),项目中的配置名也要用驼峰,不能用-。
反之如果@ConditionalOnProperty中的name是用-的话(only-gateway),项目中的配置名可以用驼峰,也可以用-。
也可以直接选择不用@ConditionalOnProperty注解

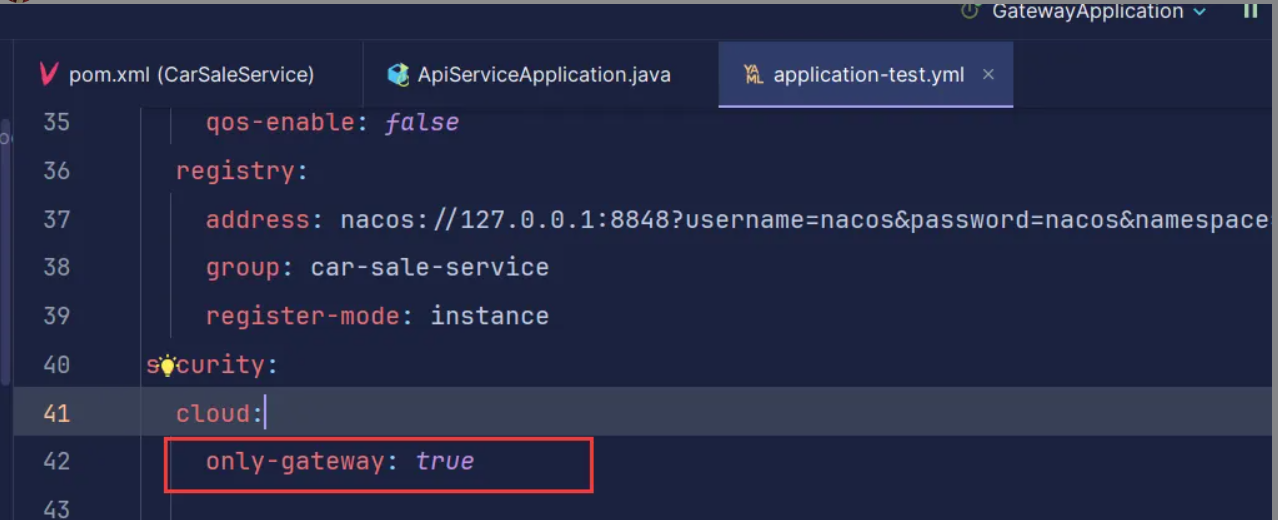
上面两个图就会导致自动装配不生效,因为onlyGateway和only-gateway不相等
8、配置spring.factories
org.springframework.boot.autoconfigure.EnableAutoConfiguration=com.lx.security.SecurityAutoConfiguration
如果是SpringBoot3版本要在
METE-INF/spring/org.springframework.boot.autoconfigure.AutoConfiguration.imports中配置自动配置
com.lx.security.SecurityAutoConfiguration
9、打包
maven install
10、引入项目
<!-- 安全认证依赖 -->
<dependency><groupId>com.lx.security</groupId><artifactId>security-spring-boot-starter</artifactId><version>1.0.0</version>
</dependency>
引入项目后配置好yml即可使用